
How to
How to choose your tires: the essential guide
Choosing the right tires greatly influences safety and efficiency on the road, but when faced with a multitude of options, the decision can seem complex. Asking the question of the best approach to identify the tires suited to your needs then becomes essential. Discover the essential advice to make the right choice and buy an ideal tire for optimized driving.
Respect the size of your car’s tires
Choosing the right tires for your vehicle is essential to guarantee safety and performance. The correct size ensures optimal grip and effective braking . An inappropriate size can, however, have a negative impact on fuel consumption and driving comfort. It is therefore important to inform yourself before any purchase. Finding the right size involves understanding the technical specifications of your vehicle. Car manufacturers recommend precise dimensions, adapted to the characteristics of each model. Following these recommendations helps maintain vehicle performance and avoid risks on the road. Consulting your car’s owner’s manual can also provide you with valuable information. This often overlooked document contains crucial details on recommended tire sizes. By following these guidelines, you ensure that the tires chosen perfectly meet the manufacturer’s expectations.
How to know the size of your tires?
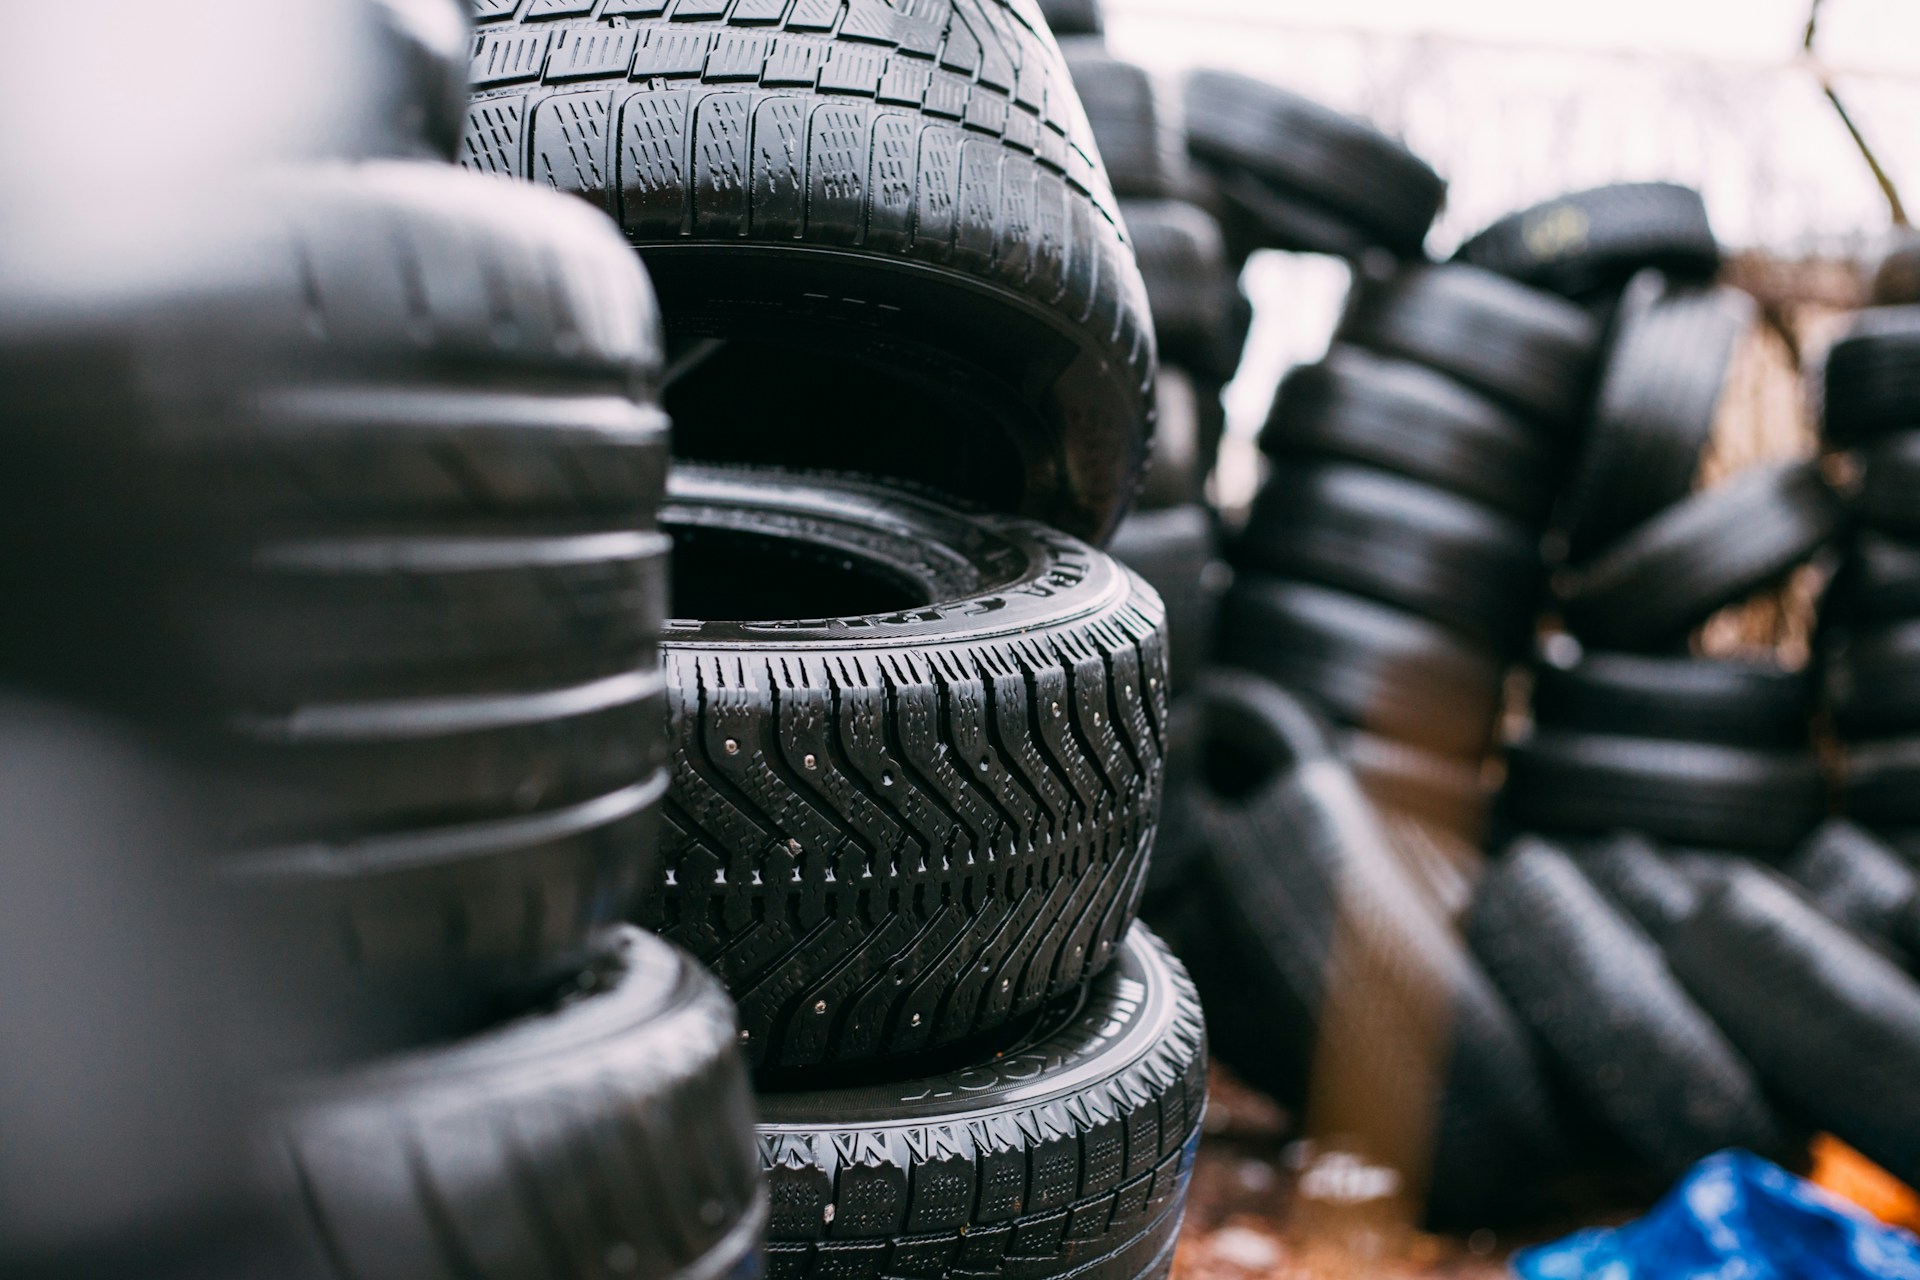
The markings on the tire are a mine of information. A reliable method to identify the correct tire size for your car is to look at the markings on the tire itself. These alphanumeric sequences provide precise dimensional information. By deciphering them, you can determine the exact specifications without risk of error. This ensures that the new tires meet the performance and safety needs of your vehicle. Another often underestimated source of information is found on a label placed inside the driver’s door . Here, manufacturers indicate the ideal tire sizes, specifically selected to harmonize with the vehicle design. This direct recommendation from the manufacturer simplifies the choice, reducing the risk of selecting tires incompatible with the capabilities of your car. Taking the time to read this information may seem tedious, but it is an essential step. It guarantees that the tires chosen are perfectly suited to your vehicle. Ignoring these details can lead to inconvenience and additional costs in the long run.
What do these inscriptions mean?
Interpreting tire markings plays a vital role in selecting the right tires for your vehicle. These codes, although complex at first glance, offer valuable details on tire dimensions and capacities . The width of the tire, expressed in millimeters, is the first value in this sequence, indicating the extent of the tire from sidewall to sidewall. Next, the height/width ratio determines the sidewall height, calculated as a percentage of the width, directly influencing ride comfort and handling. You would have understood it. The markings on a tire reveal details like diameter, width and height. For example, a “205/55 R16 91V” marking indicates a width of 205 mm, an aspect ratio of 55%, and a diameter of 16 inches. These measurements are crucial to choosing a tire compatible with your vehicle. The speed and load index are also coded by letters and numbers. In our example, “91V” indicates a maximum load capacity of 615 kg per tire and a maximum speed of 240 km/h. Understanding these codes helps you select tires that support the weight and maximum speed of your vehicle.
Choose a tire adapted to the season
Selection of the ideal tire strongly depends on weather conditions and the specifics of each season. Here are the right times to opt for summer, 4-season or winter tires as well as practical advice for each situation.
When to choose a summer tire?
With the arrival of good weather, summer tires become the optimal solution. Designed to excel in dry and wet conditions, their specific composition provides superior grip and improved fuel efficiency in temperatures above 7°C. Their structure promotes less wear on hot roads, thus guaranteeing increased longevity. For more information, check out this complete guide to summer tires . In summer, the responsiveness of these tires is unrivaled, offering remarkable driving precision. Their rigid composition helps reduce the braking distance , a significant asset for safety. Long-distance journeys also benefit from this efficiency, with optimized fuel consumption. However, as soon as the thermometer drops below 7°C, their performance decreases. This is when 4-season or winter tiresbecome more appropriate. In summary, for summer driving, summer tires are a wise choice.
When to choose an all-season tire
4-season tires are presented as a compromise between summer and winter models. Suitable for a wide range of weather conditions, they avoid the need for biannual tire changes. Their composition allows good performance as long as the extreme conditions of winter or summer are not reached. These tires are ideal for regions with moderate seasons, without heavy snow or excessively high temperatures. They offer significant flexibility for those looking for an all-in-one solution. However, they do not match specialist tires in terms of pure performance under extreme conditions. The choice of a 4-season tire therefore depends on your usual driving environment and your desire to compromise between convenience and specific performance. For daily use without the extremes of the seasons, they represent a balanced option.
When to choose a winter tire
When winter sets in with its share of snow, ice and negative temperatures, winter tires become essential. Their rubber remains flexible even at low temperatures, ensuring better grip and safety. Designed to efficiently evacuate snow and slush, they reduce the risk of slips and accidents. The importance of equipping your vehicle with winter tires from the first cold weather cannot be underestimated. They are essential for maintaining safe and controlled driving. Regions prone to harsh winters should not hesitate to make this choice. Switching to winter tires before the arrival of the first frost allows you to be prepared. Waiting for the first snow can be risky as road conditions can change quickly. So, for maximum safety in winter, dedicated tires are strongly recommended.
Buy a tire that fits your budget
Choosing tires for your vehicle often begins with a question of budget. On the market, options vary greatly, from premium brands to more affordable options. Among the premium ones, we find recognized names like Hankook, Michelin, Goodyear, Bridgestone, Continental, Dunlop, and Pirelli. These brands are synonymous with quality and performance, suitable for those looking for the best for their car. For more details, this article on the best tire brands offers a comprehensive overview. In the quality category , brands like Kumho, Nexen, Uniroyal, Kleber, Falken, Firestone, and Yokohama offer an excellent compromise between quality and price. They are ideal for drivers looking for reliability and performance without depleting their wallet. Finally, for those on a tighter budget, budget brands such as Tracmax, Goodride, Delmax, Marshal, and Barum offer tires at more accessible prices. Although less expensive, these tires remain a viable option for everyday use without special performance requirements.
Choose your tires based on your driving
The type of driving also influences the choice of tires. For city driving, focus on comfort and low rolling resistance, thus reducing fuel consumption. Highway travel requires tires that can handle long distances at high speeds, where stability and safety take precedence. Sports driving enthusiasts will be directed towards tires offering grip and precise response, for an improved driving experience. To learn more about the best sports tires and how to choose them, check out this guide to the best sports tires . The season also plays a crucial role. Summer and winter tires provide optimal performance in their respective conditions, while all-season tires are a compromise for those seeking versatility and convenience. Tire wear is an important indicator. Worn tires can affect safety, fuel consumption and driving comfort. Regular inspection and timely replacement are therefore essential to maintain the performance of your vehicle.
Choose the right site to buy your tires
Buying tires online has become a common practice, offering convenience and extensive choice. A good purchasing site is characterized by a wide range of tires, an advantageous quality-price ratio, and prices adapted to all budgets. It is essential that the site is ergonomic, making it easier to search and compare products. Customer service should be accessible and knowledgeable, ready to guide buyers in their choice. Finally, the site should offer a wide choice of partner garages for tire fitting , guaranteeing professional installation.
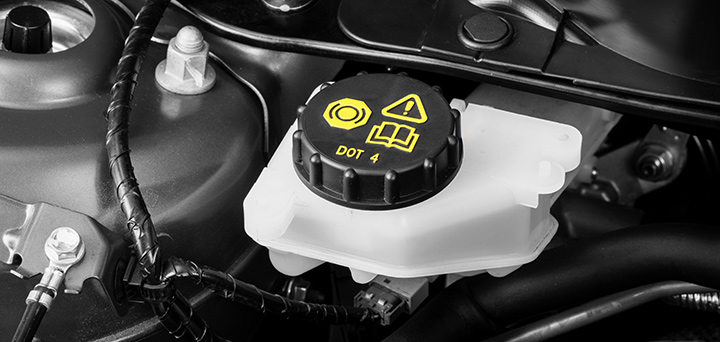
Through the braking circuit, your car’s brake fluid transmits your pressure on the brake pedal to all four wheels. It constitutes an essential safety element. But this liquid deteriorates over time and becomes less effective.
It is then a matter of completely bleeding the braking circuit: the old brake fluid is released through the four wheel brake calipers, replaced by the new brake fluid poured into the appropriate reservoir, without any bubbles. air does not enter. It is a simple operation but requires the presence of an assistant.
Here’s how to change your car’s brake fluid .
1.Get the Right Brake Fluid
Identify the right brake fluid for your car
- There are several brake fluids, classified according to their DOT (Department Of Transportation) rating.
Check the procedure on your RTA
Depending on the car, the procedure for changing the brake fluid may have certain specificities. It is therefore important to refer to your RTA before starting.
- For vehicles equipped with ABS, there is sometimes additional action to be done before replacing the brake fluid (for example, disconnecting the battery).
Important : if you empty the ABS circuit by mistake, you will have to take your car to the garage!
- For some cars, the brake fluid is replaced with the engine running. Refer to the RTA to find out.
2.Access the bleeder screws behind the wheels
To access the bleeder screws on the four-wheel brake calipers, there are 2 possible solutions.
Case 1: access the bleeder screws without removing the wheels
- Steer the wheels of your vehicle hard.
- Slide under the car and access the bleeder screws without removing the wheels. If you have a pit, this will be even easier.
Good to know : choose this solution if possible. This avoids the risk of putting the car on jack stands because there is always a danger for the mechanic if a jack stand loosens or tips over.
Case 2: remove the wheels
It is sometimes necessary to remove the wheels to access the brake calipers and their bleed screws.
- Place your vehicle on a flat surface, handbrake on, gear engaged.
- Remove the hubcaps.
- Loosen the wheel nuts one turn, using a wheel nut wrench or a cross wrench, which makes disassembly easier.
- Block the opposite wheels (front wheels when you remove the rear) with chocks.
- Use a jack to raise the car, place a jack stand next to it, and place the car on the jack stand, loosening the jack a little.
- Loosen the bolts completely and remove the wheel.
- Do the same for each wheel.
3.Fill the reservoir with new brake fluid
- Wear protective gloves and take a cloth with you to wipe off any traces of brake fluid.
Important : Brake fluid is very corrosive. Avoid contact with your skin and be careful not to leave any product on the paintwork or plastics of your car.
- Under the hood, locate the brake fluid reservoir.
Good to know : located above the master cylinder, the reservoir is generally on the driver’s side and filled with a dark liquid.
- Remove as much of the used brake fluid as possible with a pipette, syringe or bulb.
- Then replace it with new brake fluid.
- Before starting the brake bleeding, make sure that the brake fluid reservoir is filled to the maximum.
4.Determine the order of bleeding the wheels
You will bleed the calipers of all four wheels one after the other. You must first determine the order of bleeding the wheels.
Case 1: apply the Z diagram
Generally, you start with the wheel farthest from the master cylinder. The classic diagram is therefore:
- right rear wheel;
- left rear wheel;
- right front wheel;
- left front wheel.
This order is called the Z pattern.
Case 2: Follow another pattern
Brake bleeding can also be done in an X pattern or in another order.
Check the order recommended in the automobile technical review (RTA) for your car before starting the operation.
5.Bleed the first brake caliper
Good to know : for purging, ask someone for help. She will press the brake pedal while you bleed the brake caliper from the wheel.
Start by bleeding the first wheel caliper in the order you determined in the previous step.
Install the bleeder hose on the first wheel
- Clean the brake caliper.
- Place a container on the ground with a few centimeters of new brake fluid at the bottom.
- Remove the rubber cover on the bleeder screw.
- Place a clear rubber hose, such as an aquarium hose, over the bleeder screw. The other end of the hose goes into the brake fluid at the bottom of the container.
Perform the purge
- Hold a spanner ready to open the bleeder screw.
- Have the second person depress the brake pedal gently, then hold on to it when it becomes hard.
- Open the bleeder screw by turning a quarter turn. Used brake fluid flows into the hose.
Good to know : during the flow, the brake pedal depresses. Your assistant maintains his support.
- Ask him to pump the pedal two or three times and then keep it depressed.
- When pumping, make sure the jar is always sufficiently full. Replace new brake fluid in the reservoir approximately every 3 pedal strokes.
Important : when the brake pedal is released, brake fluid from the master cylinder reservoir enters the circuit. You must therefore fill this tank to avoid air entering and having to start all over again.
- When clearer brake fluid comes out through the bleeder screw, close it.
- Your assistant can only then release the brake pedal.
Important : you must not release the front pedal as air may enter the circuit through the pipe. The few centimeters of brake fluid at the bottom of the container into which the pipe arrives are used to prevent this: if the pedal is released, it is fluid that will come up, not air.
- Empty the hose into your container before unplugging it.
6.Bleed the brake fluid from the following wheels
Repeat these operations for the other 3 wheels, respecting the bleeding order previously established.
- Place the bleeder hose onto the bleeder screw.
- Open the bleeder screw.
- With the help of your assistant pressing the brake pedal, bleed the caliper. Make sure the jar is always full enough.
- Bleed the brake caliper until clear brake fluid comes out.
Good to know : there are brake bleeders that allow you to bleed without the help of a person, by putting the brake circuit under constant pressure.
7.Test your purge
- Once all four brake calipers have been bled and all bleeder screws have been tightened, depress the brake pedal again and check that no fluid is coming out.
- Then turn the four wheel hubs one by one by hand. Check that the hub stops suddenly when you press the brake pedal.
- Remount the wheels and test the braking again in real life. First start driving a few dozen meters.
- Finally, collect and throw the drained brake fluid into the recycling center.
Important : it is a very harmful substance for the environment. It cannot be poured into a sink or a trash can.
-

 Entertainment2 months ago
Unveiling the World of HDToday
-

 Technology2 months ago
Unveiling the Wonders of Teltlk Technology
-

 Business2 months ago
Unlocking Opportunities with GovDeals – Liquidity Services Marketplace
-

 Technology2 months ago
Çebiti: Corporate Operations with an Integrated AI Platform
-

 Health2 months ago
Illuminate Your Scans: Unveiling the Magic of Luminous Scans in Modern Imaging
-

 Technology2 months ago
Unlocking the Mystery of QXEFV
-

 Life Style2 months ago
Exploring the Charm of myfavouriteplaces.org: A Journey into Wanderlust
-

 Health2 months ago
Exploring the Benefits of wellhealthorganic Home Remedies